Stream Page Guide
The Stream Page allows users to view, manage, and create live streams. This guide will walk you through navigating the stream page, managing your streams, and scheduling new streams.
Accessing the Stream Page
-
Navigate to the Stream Page by clicking on the Stream option in the main navigation menu at the top of the webpage.
-
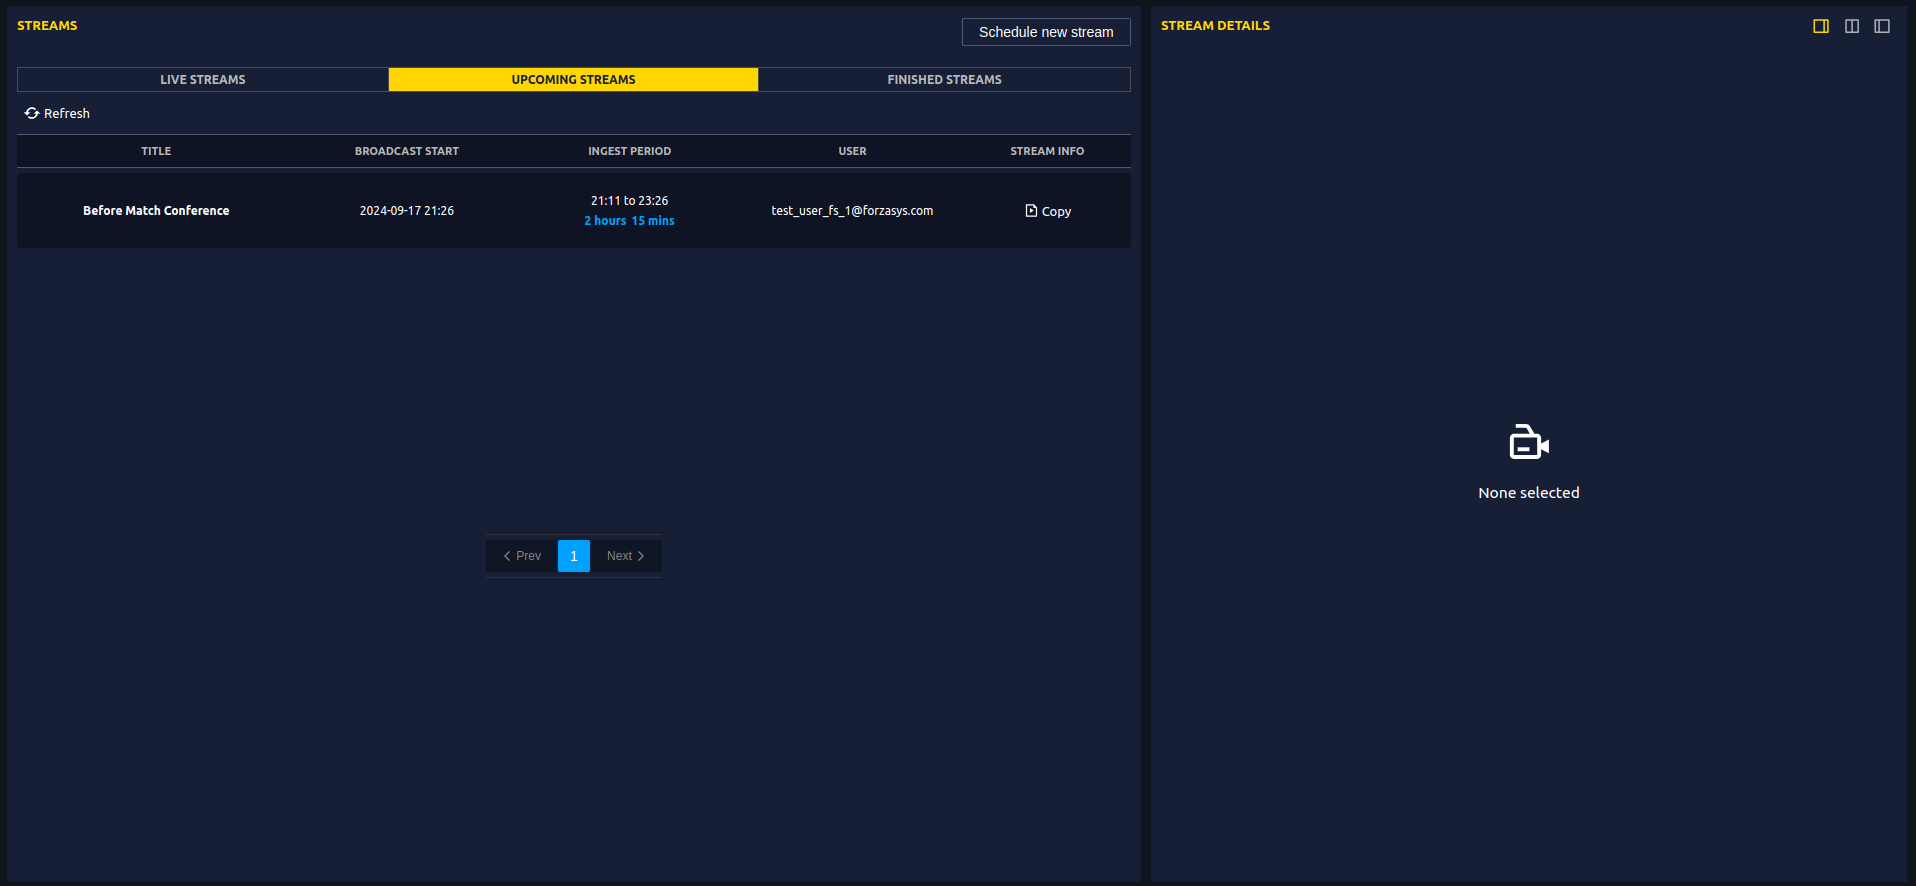
On this page, you will see a list of:
- Live Streams
- Upcoming Streams
- Finished Streams
Users can manage any stream by clicking on it from the list.
Creating a New Stream
To schedule a new stream, follow these steps:
-
Schedule a New Stream:
- Click on the Schedule a new stream button to start the stream creation process.
-
Select Stream Type:
- Choose between the following options:
- RTMP (Real-Time Messaging Protocol)
- SRT (Secure Reliable Transport)
- Choose between the following options:
-
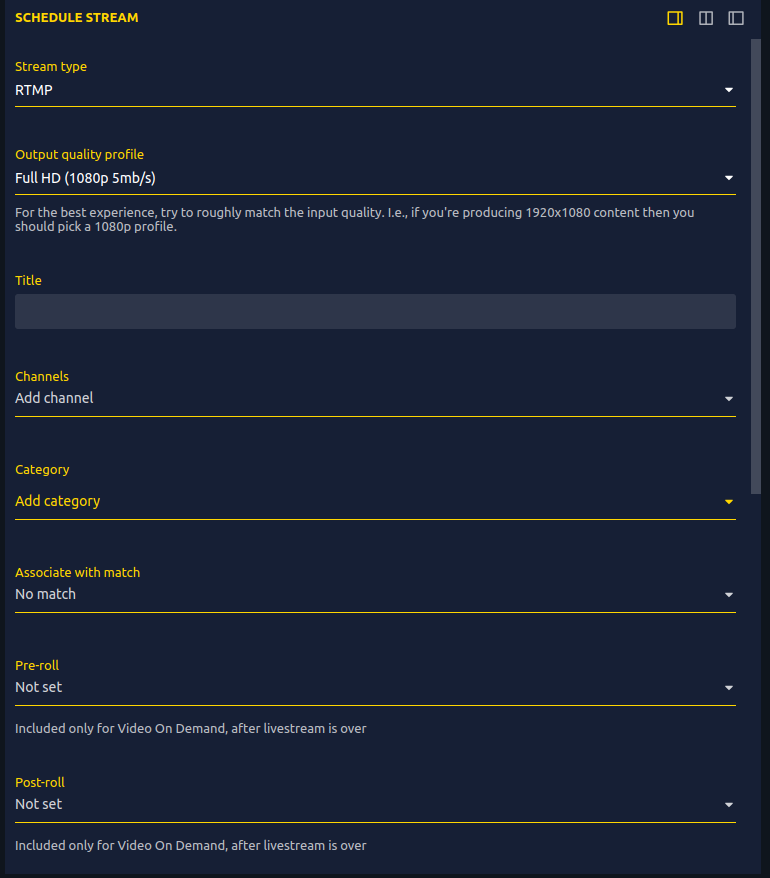
Fill Out the Stream Details:
- Stream Type: Select your preferred streaming method (RTMP or SRT).
- Output Quality Profile: Select the appropriate quality from the available options
Note
For the best experience, match the input quality to the output profile. For example, if you are producing 1920x1080 content, choose a 1080p profile.- Title: Enter the title for your stream.
- Channels: Select the channels where the stream will be broadcasted. Possible to include multiple channels.
- Category: Choose the category for the stream—for example: match, interview, etc. You may include multiple categories.
- Associate with Match: If the stream is associated with a match, select the match.
- Pre-roll and Post-roll (for Video on Demand only):
- Pre-roll: Choose a pre-roll option to include content before the livestream starts.
- Post-roll: Choose a post-roll option to include content after the livestream ends.
Note
Pre-roll and post-roll are only available for Video on Demand after the livestream.- Broadcast Start Time: Set the approximate time for when users should tune in to the stream.
Note
Users can tune in as soon as the input is received. Ensure any pre-stream testing is done on a separate, unpublished stream.- Maximum Duration: Reserve a duration for the stream.
- Thumbnail: Choose how to set the thumbnail for the stream — auto-generated or customized.
- Publish Options:
- Not Published: The video will be unlisted and can be changed later.
- Publish Immediately: Publish the video as soon as it is created.
⚙️ Final Step:
After the stream is created, you will receive an RTMP/SRT URL and a Stream Key.
Copy these values and paste them into your streaming software or hardware, such as OBS Studio or your camera's streaming setup. -
Create or Cancel:
- After filling out all the details, click Create to schedule the stream, or click Cancel if you need to abort the process.
Stream Management
Once a stream is created and listed, users can click on any stream to manage it further. Below are the options available when managing an individual stream:
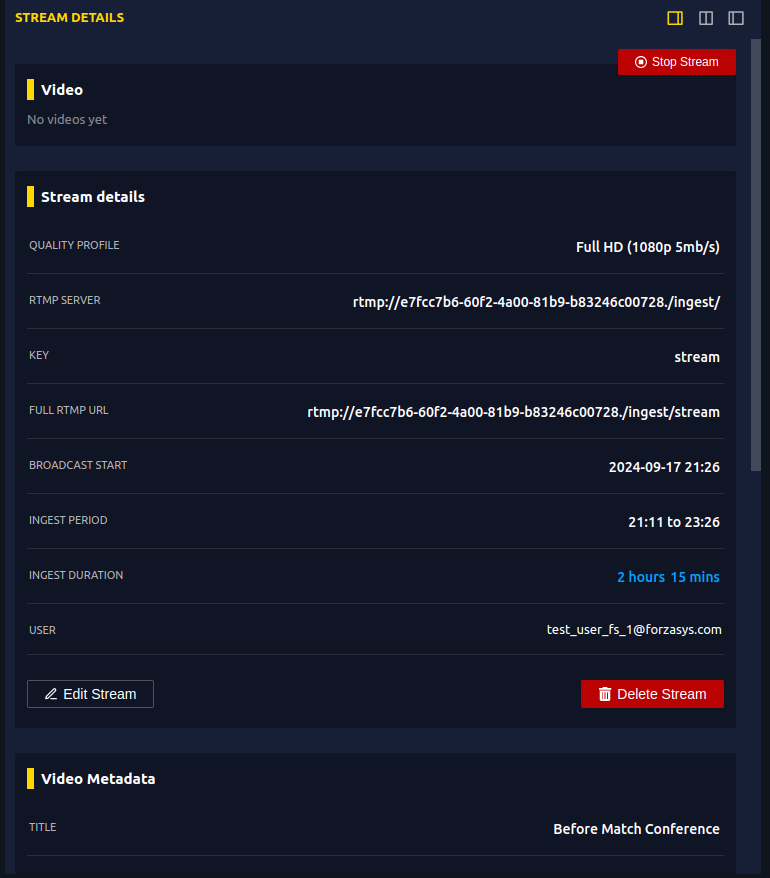
Stream Details and Video Metadata
After selecting a stream, users can view and edit the essential details of the stream and video metadata such as:
- RTMP Server: The RTMP server address where the stream is being sent.
- Stream Key: The unique stream key used to authenticate the stream.
- Broadcast Start: The scheduled start time of the broadcast.
- Ingest Period: The window of time during which the system can ingest (receive) the stream.
- Thumbnail: The thumbnail image for the stream or video. You can customize or update the thumbnail here.
- Statistics: Total number of views and detailed analytics, such as view counts over time.
Managing the Streams
Users have several management options available:
- Stop Stream: Manually stop the stream if it is currently live.
- Edit Stream: Modify the details of the stream, such as the title, schedule, or streaming method (RTMP/SRT).
- Delete Stream: Permanently delete the stream and its associated details.
- Edit Metadata: Modify the metadata such as the title, categories, or description of the video.
- Edit Permissions: Adjust who can view, tag or access the video.
- Delete Video: Permanently remove the video and all associated data from the system.
Need Help?
If you need assistance while creating or managing your streams, or if you'd like help setting up your stream inputs automatically, please contact our Support Team. We're happy to help!