Downloading and Exporting a Video
This page guides you through the process of exporting and downloading a video using advanced export options in Forzify MAM.
Please note that for downloading your video in a specific format, you should select the "Prepare Export" option and configure the settings as needed.
Steps to Export and Download a Video
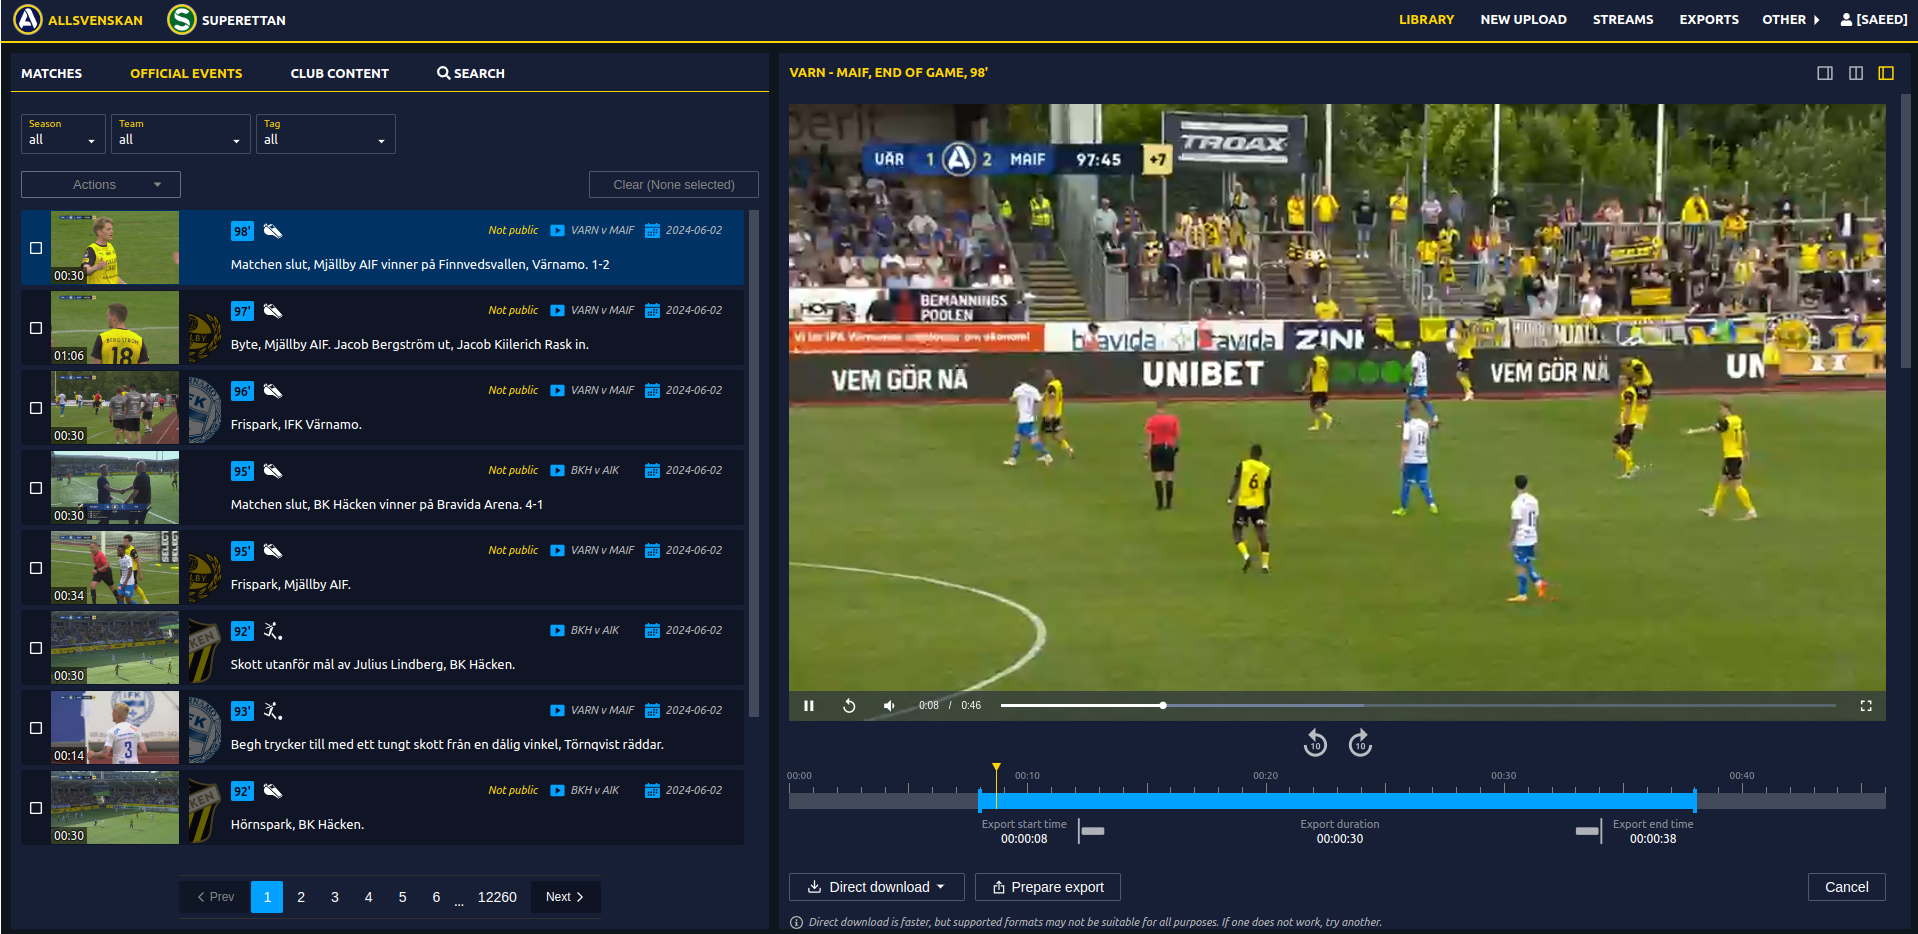
- After logging in, navigate to the video you want to download by accessing the official events section.
- Click on the "Prepare export" button to initiate the export process.
 3. Adjust Video Duration:
- After clicking "Export", you will see a blue bar representing the video's timeline. You can click and drag the edges of this blue bar to increase or decrease the video's duration. Adjust the timeline to the desired length for your export.
- If you are satisfied with the adjustments, click on the "Save" button to apply the changes. If you wish to discard the adjustments, click on the "Discard" button.
- Below is a snapshot of the interface where you can adjust the video duration.
3. Adjust Video Duration:
- After clicking "Export", you will see a blue bar representing the video's timeline. You can click and drag the edges of this blue bar to increase or decrease the video's duration. Adjust the timeline to the desired length for your export.
- If you are satisfied with the adjustments, click on the "Save" button to apply the changes. If you wish to discard the adjustments, click on the "Discard" button.
- Below is a snapshot of the interface where you can adjust the video duration.
- After clicking "Export", you will see a blue bar representing the video's timeline. You can click and drag the edges of this blue bar to increase or decrease the video's duration. Adjust the timeline to the desired length for your export.
- Below is a snapshot of the interface where you can adjust the video duration.

Alternative: Skip Segment Feature
Instead of adjusting a single continuous segment, you can use the Skip Segment feature to cut out a portion from the middle of your video while keeping the beginning and end portions.
- Enable Skip Segment: In the export settings, locate and enable the Skip Segment option. This will allow you to define two separate portions of the video to keep.
- Adjust the Timeline: Once Skip Segment is enabled, you will see the timeline with adjustable markers:
- Part 1 (Beginning): Drag the markers to define the start and end of the first segment you want to keep.
- Part 2 (Ending): Drag the markers to define the start and end of the second segment you want to keep.
- The portion between Part 1's end and Part 2's start will be skipped in the final export.

Example: If you have a 1-minute video and want to remove the middle 20 seconds, you can set Part 1 from 0-20 seconds and Part 2 from 40-60 seconds. The resulting exported video will be 40 seconds long.
| Original Video | Part 1 | Skipped | Part 2 | Output |
|---|---|---|---|---|
| 60 seconds | 0s - 20s | 20s - 40s | 40s - 60s | 40 seconds |
-
Configure your export settings:
-
Select "Advanced settings" to access additional configuration options.
- Choose the "Preset" if you want to encode your video according to a social media requirments.
- Decide on a "Graphic package" if additional graphics are required. For no additional graphics, select "None." For detailed instructions on adding graphic packages, see Adding Graphic Packages.
- Choose "Set Aspect Ratio" the appropriate aspect ratio for your export.
Set Cropping:
- Center: Maintain the center of the frame during the crop. This is useful for keeping the main subject in focus if it is centrally located.
- Smart crop: Automatically adjusts the cropping to match the targeted aspect ratio while ensuring important content remains visible. Ideal for adapting videos to various display dimensions.
- Ensure the "Audio bitrate" is set to "Original" to maintain the best audio quality.
- Configure "AI clipping" to automatic trimming of the end and beginning of the video for enhancing user QoE.
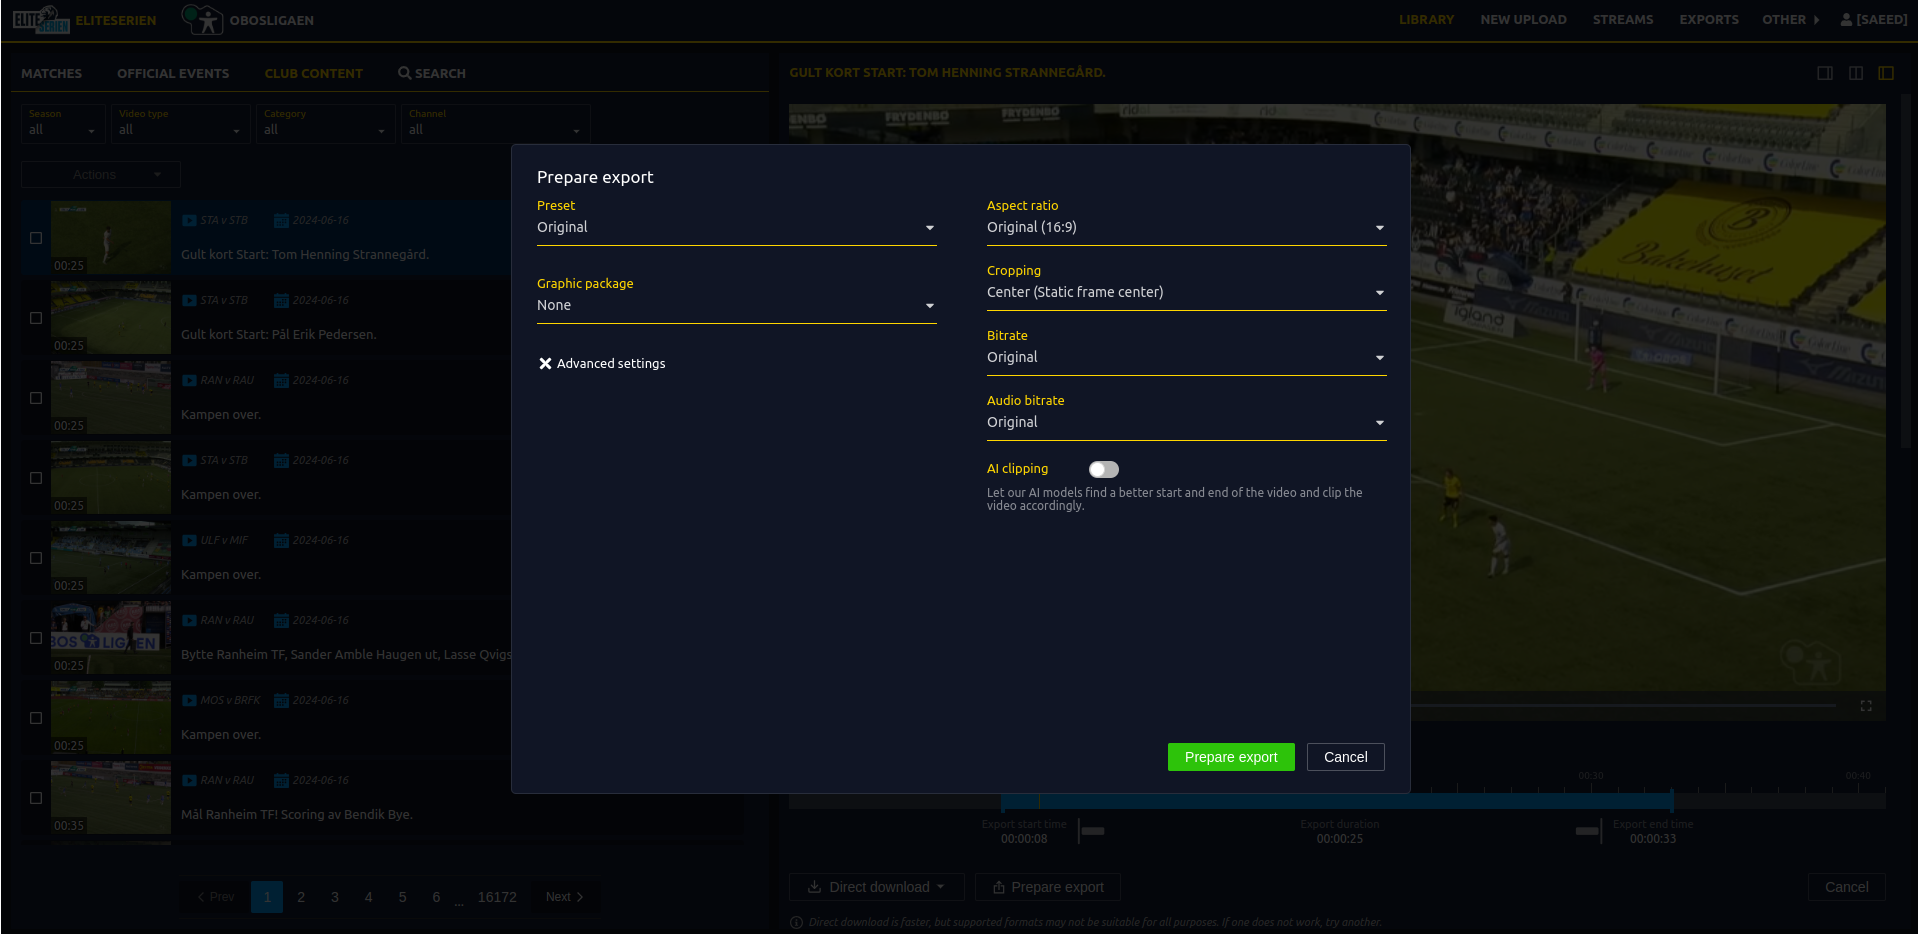 5. After setting up all options, click on "Prepare export" to process the video with the specified settings.
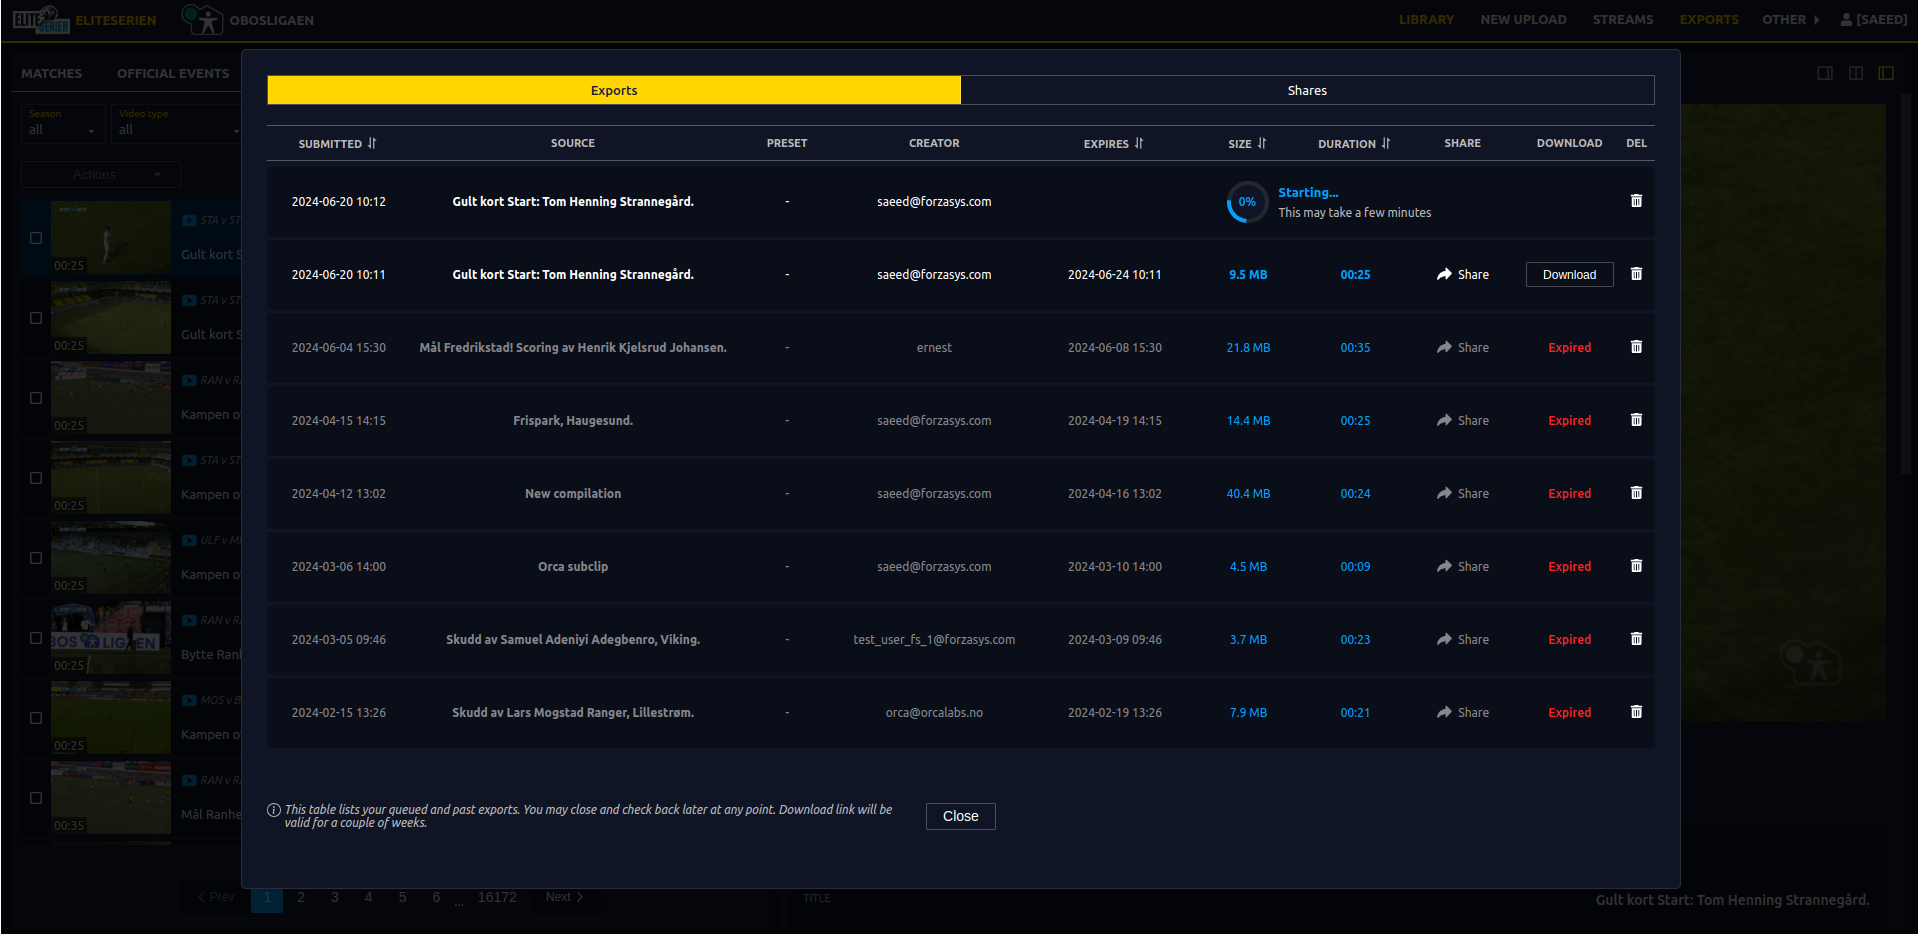
6. Once the video is ready, note that depending on the selected configurations and the video content, it could take up to a few minutes. Click on "Download" to download the video.
5. After setting up all options, click on "Prepare export" to process the video with the specified settings.
6. Once the video is ready, note that depending on the selected configurations and the video content, it could take up to a few minutes. Click on "Download" to download the video.
Need Help?
If you encounter any issues, don’t hesitate to contact our Support Team for help.